Friday, April 3, 2015

Mockups...

Valuable information from an earlier post on a display cabinet design. After completing the main case of a display cabinet, work began to create the inner drawer case. The first step in the sequence was to get the proportions correct using a cardboard mock up of the drawer case. After a few iterations, the mock up in the photo was the preferred layout. The design considerations which used are as follows:

Height of the drawer case, number of drawers, width and height of individual drawers


A cardboard mock-up is a very important step in my opinion, as it serves to both provide a visual image of the drawer case and to point out any possible subtle issues with the layout. The drawer case is set back from the edge of the main case to allow for drawer handles and a little extra for the door stops. The drawers can be removed and individually placed on the top of the drawer case for better viewing. I debated whether to overlay the horizontal drawer dividers with the door fronts, but since all the wood is uniform and of the same species ( cherry), I would have the horizontal dividers visible. The components of the drawer case are for the most part dadoed and rabbeted together and the horizontal dividers each slide in between two grooves. The center vertical divider will be permanently attached to the drawer case. The rabbeted sides will also have a couple of dowels in each of four edges for reinforcement.

Since the cardboard mock-up is sized exactly to scale, I have the benefit of using it to size the components of the drawer case for milling and dimensioning. At this point, the boards used for the drawer case are sawn and they are allowed to stabilize before any further processing. This is to remove any inner stresses in the wood.

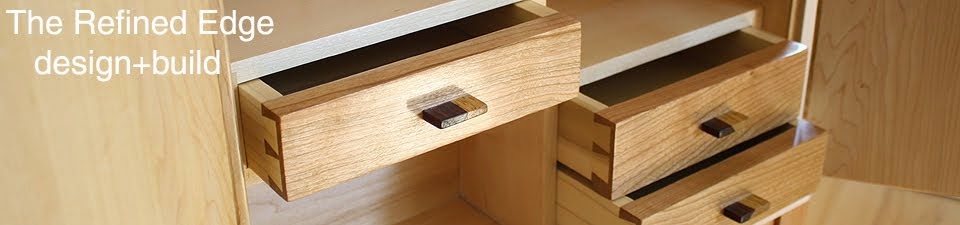
The individual drawers will have dovetailed drawer fronts and rabbeted backs and the bottom panel will be floating in a small groove on all four sides of the drawer. 


Sunday, March 29, 2015

Hand Planes...

Over the years I have amassed quite a few hand planes in my shop. The hand planes range from early wood and transitional planes to specialty rabbeting planes, block planes, bench planes and jointer sized planes. For a time, I enjoyed restoring old wood and transitional hand planes and would often re-sole the transitionals with new hardwood soles. I replaced cracked handles with newly crafted ones. I soon found that these early versions of hand planes did not perform as well as modern hand planes even with considerable fettling and tuning. For a period of time, I was crafting my own wood bodied hand planes with modern thick blade assemblies and these performed considerably better as the mouths were tighter. 


On to the modern steel-bodied planes. I currently own an assortment of these hand planes primarily from two or three manufacturers and they tend to perform very well as long as the blades are kept sharp. Regular sharpening is key to the performance of a hand plane. Also, adjustments are much more precise on the newer hand planes with either Norris type or Bedrock type setups. 


With the considerable assortment of hand planes in my shop, I find I that I tend to reach for the same four planes, These are a No. 4.5, No. 7, Standard angle Block and Lo-angle Block. I very often grab the Standard angle block plane as a small smoother when working on small parts. It works well, is light and easy to maneuver. The bench smoother is a Bedrock type No. 4.5 and is my most frequently used hand plane. The longer No.7 is used to work long edges and flatten boards. The Lo-angle block plane is used primarily for planing across short edges and ends of boards. I reach for some of the other specialty planes when the need arises. The conclusion to all this is that more often than not I find myself reaching for these four hand planes. It is easier to keep these hand planes blades sharp and thus maintain fewer tools. This was not planned but a method of work developed over the years for reasons of efficiency, versatility and speed. 

All for now...